Hello everyone
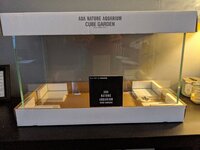
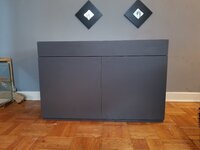
Jon here with my rendition of the ADA 60P aquarium cabinet. I had seen many different attempts with varying materials and build methods, I wanted to bring you along for my journey and share with you what it is i have done , SO enjoy the photos ! I have also included a picture of a fully built one I did about a year ago")
Materials:
3/4" Oakwood Plywood , it's very strong and doesn't damage as easily as MDF
Tite Bond wood glue, Extremely strong and resistant to water
#10 Biscuits , Help create a strong and even joint
Screws , I find they do just as good of a job than clamps.
Formica Laminate , Professional look and i am not a good painter so this helps alot.
J Roller - helps create a strong bond between the wood and the formica
Heavy Duty spray adhesive , This stuff smells really bad but it works great
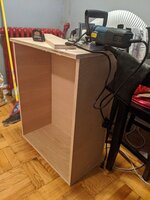
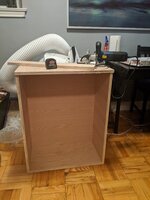
After I cut all the wood to size, I used a biscuit joiner to connect all the pieces of wood along the edges. this wonderful tool allows for precise tight boxes that leave no gaps or errors when used correctly.
The biscuits are then glued into the slots in both holes. the wonderful thing about this glue is that you have time to make minor adjustments if you do make a mistake . Now, instead of using clamps I used 1-1/4" screws. Some people may not like this but, it works for me and it might just work for you. the box is instantly tight and the glue dries within 24 hours and I don't have to worry
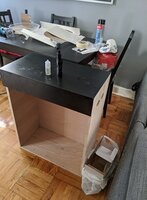
The formica was cut using a Laminate trimmer (Router) with a Laminate flush trim bit. cutting the laminate does take a little bit of practice and patience. there are some things you need to be aware of so not to burn or scratch the laminate while trimming edges.
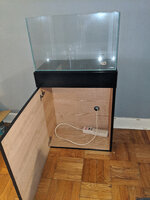
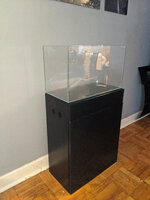
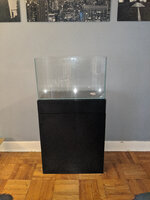
this is where I am at right now , I am almost done. once all the trim has been placed and cleaned up I will be clear coating the inside of the stand with Polycrylic. I had success with my reptile enclosures with this stuff. no mold or damaged wood at all
Looking forward to posting the finished job in a few days , If you have questions please let me know
Jon
Jon here with my rendition of the ADA 60P aquarium cabinet. I had seen many different attempts with varying materials and build methods, I wanted to bring you along for my journey and share with you what it is i have done , SO enjoy the photos ! I have also included a picture of a fully built one I did about a year ago
Materials:
3/4" Oakwood Plywood , it's very strong and doesn't damage as easily as MDF
Tite Bond wood glue, Extremely strong and resistant to water
#10 Biscuits , Help create a strong and even joint
Screws , I find they do just as good of a job than clamps.
Formica Laminate , Professional look and i am not a good painter so this helps alot.
J Roller - helps create a strong bond between the wood and the formica
Heavy Duty spray adhesive , This stuff smells really bad but it works great
After I cut all the wood to size, I used a biscuit joiner to connect all the pieces of wood along the edges. this wonderful tool allows for precise tight boxes that leave no gaps or errors when used correctly.
The biscuits are then glued into the slots in both holes. the wonderful thing about this glue is that you have time to make minor adjustments if you do make a mistake . Now, instead of using clamps I used 1-1/4" screws. Some people may not like this but, it works for me and it might just work for you. the box is instantly tight and the glue dries within 24 hours and I don't have to worry
The formica was cut using a Laminate trimmer (Router) with a Laminate flush trim bit. cutting the laminate does take a little bit of practice and patience. there are some things you need to be aware of so not to burn or scratch the laminate while trimming edges.
this is where I am at right now , I am almost done. once all the trim has been placed and cleaned up I will be clear coating the inside of the stand with Polycrylic. I had success with my reptile enclosures with this stuff. no mold or damaged wood at all
Looking forward to posting the finished job in a few days , If you have questions please let me know
Jon