• You are viewing the forum as a Guest, please login (you can use your Facebook, Twitter, Google or Microsoft account to login) or register using this link: Log in or Sign Up

Custom spray bar for Evolution Aqua ReefPro 900s

goldscapes

Member
Joined
21 Aug 2018
Messages
239
Location
Surrey
Hi there,
I’m posting a design for a custom spray bar for an Evolution Aqua Reef Pro 900s being used as a freshwater planted tank.
The reason for posting this here is to give others with experience of this the opportunity to contribute, leaving a (hopefully) useful resource for others who are doing something similar.
Here is a sketch of the overall design:
1661415357592.png
And now the commentary:
  • the 900s uses a standard herbie style sump overflow system with a single off-centre inlet. The manufacturers instruction manual suggests using this, in conjunction with a powerhead, to generate sufficient flow for a marine tank. I don’t want to run a separate powerhead and the 3000lph return pump should generate plenty of flow for a planted tank if I can create a better method of distributing it around the tank. After reading a lot of articles on here, I run spray bars to good effect on two tanks already so I am confident this is a better solution than a single jet inlet for reaching all the corners of the tank (please start a new thread if you wish to debate this).
  • the inlet has an elbow joint with a 20mm female threaded connector. If anyone knows where I can find a suitable male connector to start this off I would be very grateful, I can only seem to find BSP (imperial) threaded connectors online (but I probably just don’t know what I should be searching for).
  • the remaining connections should all be push-fit/friction joints so that I can dismantle the bar for cleaning.
  • the overall width is 640mm this was judged by eye and leaves a bit of space each side to allow maintenance.
  • as the inlet is already stepped down to less than 20mm I’m assuming 20mm pipe work will be fine.
  • I used this post from @zozo to roughly calculate the number and size of the exit holes and rounded down to 3mm diameter (I figure I can always make them a bit bigger if necessary)

Any thoughts gratefully received.
 
Last edited:
I used this post from @zozo to roughly calculate the number and size of the exit holes and rounded down to 3mm diameter (I figure I can always make them a bit bigger if necessary)
That should work. Sizing down is usually ok, I dont recommend exceeding the area of the pipe as this can cause the flow to exit strangely and not evenly over the full bar. Ive experimented with 75% to 95% of the area usually and found good results in this range. It depends on if you want more flow or less.
 
:) I'm curious how it will work out for you... The calculation is just a simple theory to equal out the flow through... All tho your design is not symmetrical and there like will be more water pressure and flow on the short side of the spray bar and less pressure at the last hole from the long side. If you would like to have equal pressure and flow over each hole in rather lengthy spray bars you actually should make a loop.

This is also common practice for automatic watering installation in horticulture which is in principle the same as a spray bar using labyrinth valves instead of simple holes and to prevent the first nozzle from giving sooner and thus more water than the last nozzle in the installation at X time water pressure. Then in the loop with the water taking the route of least resistance all nozzles will start spraying simultaneously and the same amount. In a circle there basically is no first and last. The circle has no beginning nor an end it is endless.

And then still you need to keep it clean all the time, dirt build up in and around the holes will alter how it sprays.

With a loop, I mean this.
sbl.jpg
 
Last edited:
If you would like to have equal pressure and flow over each hole in rather lengthy spray bars you actually should make a loop.
Very interesting, and thank you for the illustration, I have taken the liberty to save it to my computer because I like it so much 😍
I even have an idea how you can mount it for an aquarium, maybe not in the OP's setup but for normal tanks you could have the spray bar (the one without the holes) either out of the water above the one with holes in the tank, or you could use 90degree elbows and have it behind the back glass for tanks with no rim. In the latter case you would not need suction cups either, because the spray bar assembly is draped over the back wall and rests there on its own. Think of it like a thin pancake hanging over a wall. Maybe I will need to draw this too for it to be understandable though.

I have been looking for a solution for the unevenness of a very long spraybar or one with many holes, for some time.
I had the idea of trying to get a lot of water movement through a tank but without having high velocity of the water. So moving a large volume of water without moving it quickly.
I then ran into the issues that when you make holes in the spray bar that exceeds the 100% of the area of the pipe, the water starts coming out unevenly. I was able to mitigate this effect a little with modified spacing of holes, but not to a satisfactory degree.
I definitely need to try your sketch for the next time I experiment :thumbup:

Apologies to @goldscapes for going off topic
 
Yup make the Hang on spray bar... :)

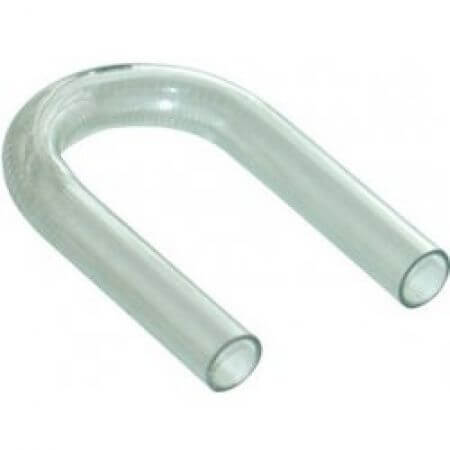
An LFS near my place was rather famous for having loads of new old stock stuff. And they still had these U bends in 8,12,14 and 16mm. Would be aesthetically a tad more pleasing.
U-bocht-8-mm.jpg


There was a time when it was pretty common but unfortunately, they are out of stock and out of production... At least the producer supplying LFSs has stopped. I nicked the last ones I could find from the shelf a few years ago. Till now I've not seen them again in lfs or pet stores.

I see this store still has a few 14mm in stock.

But I guess doing a proper search for PVC U bend or something similar might still come up with some results.
 
Ok, job done. Just need the rest of the bits and bobs to arrive so I can try it on the aquarium. At the moment I’m concerned about it getting in the way of the lights and casting shadows. Fortunately, I have enough pipe spare to create a centred bar if I need to, I’ll just need a couple of end caps.
C60C62D4-06D3-429A-BBE4-58383674EBD2.jpeg
 
Quick update, the spray bar is in place and works really well. The loop not only provides even flow but also allows the exit holes to be positioned below the surface of the water, this reduces the noise and generates lots of surface agitation. It does get in the way of the lights a bit but no more so than the hardscape roots I have in the tank so it’s not noticeable.
 
Hi Dai,
I've only just seen this, sorry about the delay in replying.
Here a snippet from the invoice with the parts I ordered:
Screenshot 2023-05-05 at 20.34.17.png
I used www.plasticpipeshop.co.uk but other vendors are available :)
Total cost was £16.09 including £5.99 for shipping.

Spray bar seems to work well, circulation is good and it's easy to clean.
It does sit further forward in the tank than I expected which causes a slight reduction in flow behind the spray bar, I use this area for floating plants though so it worked out well.
Clear acrylic is something you might want to consider but it was much more expensive when I looked.

Hope this helps, good luck!
 
Back
Top