I'm also not a true aquascaper and consider myself still a novice after 5 years and creating 5 different scapes. SO i'm not even going to try to critique anything.. It takes a lot more tryouts and quite a large budget (a rather big pile of different hardscape materials) to get to a certain point of perfection. To achieve this one would need to create several different scapes in a year time for a few years in a row.
With limited resources, there will always be a lot less option to choose from. It doesn't make it all easier.
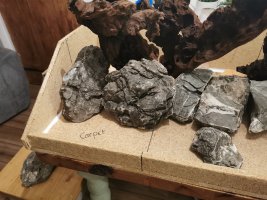
But there are a few rules to take into respect that definitively work in your favour if applied correctly... For example, review the rule of 3ds. In a nutshell, it refers to looking at a framed picture... This is in a way what an aquarium is to a certain degree. It a box you mainly view from the front side only. Tho it has more dimensions than only this but is a nice first step to get an understanding of the concept before you dive into the deep.
Painters, photographers and even architects use this rule to pull out the focal point you want to see and use the rest of the space to compliment it. We who try to aquascape are also bound to this rule. The rule says among others you should always place the focal point at 1/3 from the right or the left side. This could be a big rock or a large piece of wood or a group of plants.
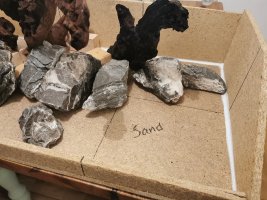
As this image shows a dog in a landscape... The dog is the focal point in this picture placed 1/3 from the right side.
The rest in the picture should complement the focal point and not draw your eyes away from it. Imagine it as if there was a red fire brigade truck driving on the road in the background that doesn't belong there seen from the focal point perspective. Then your eye would constantly pull to the red truck instead of the dog.
For us, since we are working with a 3-dimensional box, we have 2 more lines to take into account making a tad more difficult than this. But work your way from this first step, along the way you'll see what is meant.
Simply don't make it to busy for a start because you'll easily lose perspective and don't know where to look. The 2nd rule is Less is More often referred to as KISS - Keep It Simple Stupid.
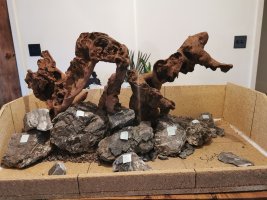
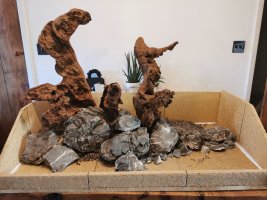
Here an example of the rule of 3rd in aquascaping.
View attachment 161254
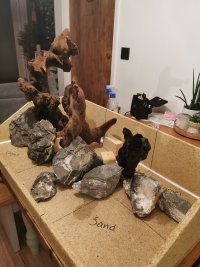
There are e few more you could use, for me personally the rule of 3rds was the easiest one to understand and try to implement. As you can see the rule not only applies to left and right but also from top to bottom and not showing in a 2-dimensional picture but also from front to back in real life viewing.
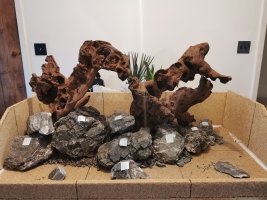
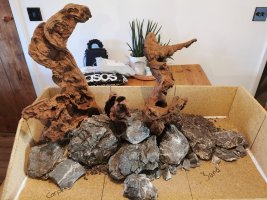
Once you get a hang of these simpler rules you can dive deeper into Fibonacci - rules of composition.
View attachment 161255
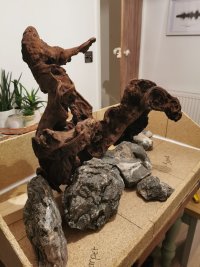
Other rules regarding creating a sense of depth is mainly in placement and size... One simple example is a smaller rock behind a bigger rock in the front, but placed at a higher level actually can be used to represent a much bigger rock at the horizon in the background. The other way around a much too large rock behind a smaller rock could completely destroy this effect.
Anyway trying to understand and implement these rules definitively will help to create much more appealing sceneries that only need small details to be improved to make it even beter.
Succes!!


 ......

")